Add Userpop to Your Website
- Last updated January 20, 2025
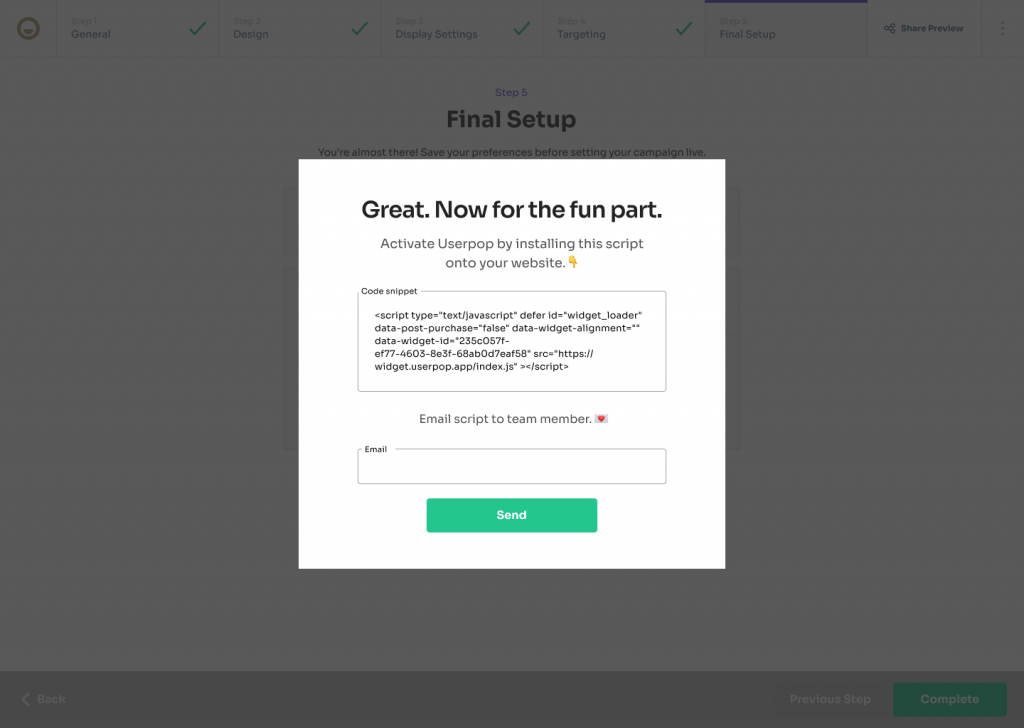
First go to the dashboard and click on ‘Install Widget Code’ in the top right corner.

You’ll see two options:
- Copy the code snippet to install it yourself, or
- Send the snippet to your developer to handle the installation for you.
How to Add Userpop to Your Website
You can install Userpop on your site in just a few minutes! Choose the method that works best for your platform:
Each guide walks you through step-by-step instructions. No technical expertise needed — but if you need help, reach out to our team anytime!
How to Add the Userpop Snippet Manually
Click Copy code and paste it before the </body> tag on every page you want the comment widget to appear on your app.

After adding the code, view your website as a visitor and the comment widget will appear.
How to Add the Userpop Snippet via Google Tag Manager
- Log in to Google Tag Manager
- Access your GTM account at tagmanager.google.com and select the container associated with your website.
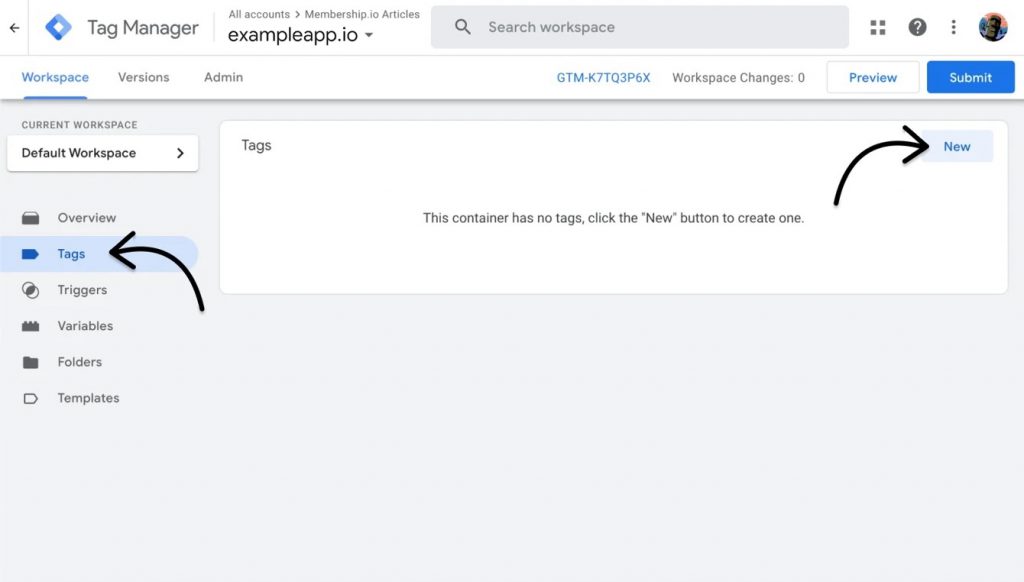
- Create a New Tag
- In the left-hand menu, click on “Tags”.
- Click the “New” button to create a new tag.
- Configure the Tag
- Click on “Tag Configuration”.
- Choose “Custom HTML” as the tag type.
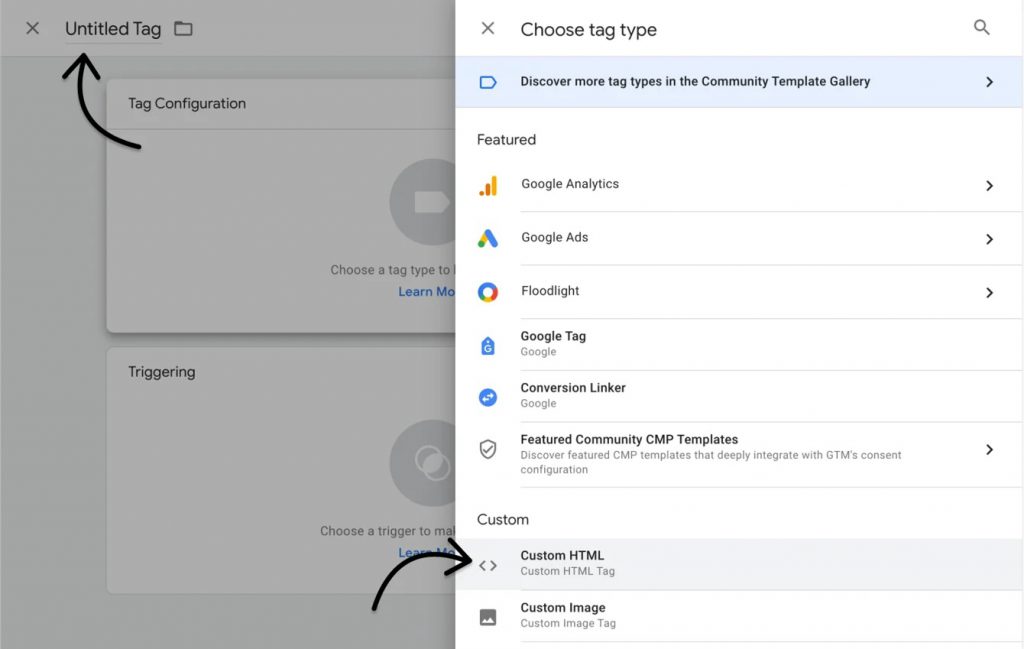
- Paste your unique Userpop JavaScript snippet into the HTML field.
- You can find your snippet by logging into your Userpop account and navigating to Edit Widget > Widget Code.
- Click the pencil icon at the top and name your tag “Userpop” for easy tracking
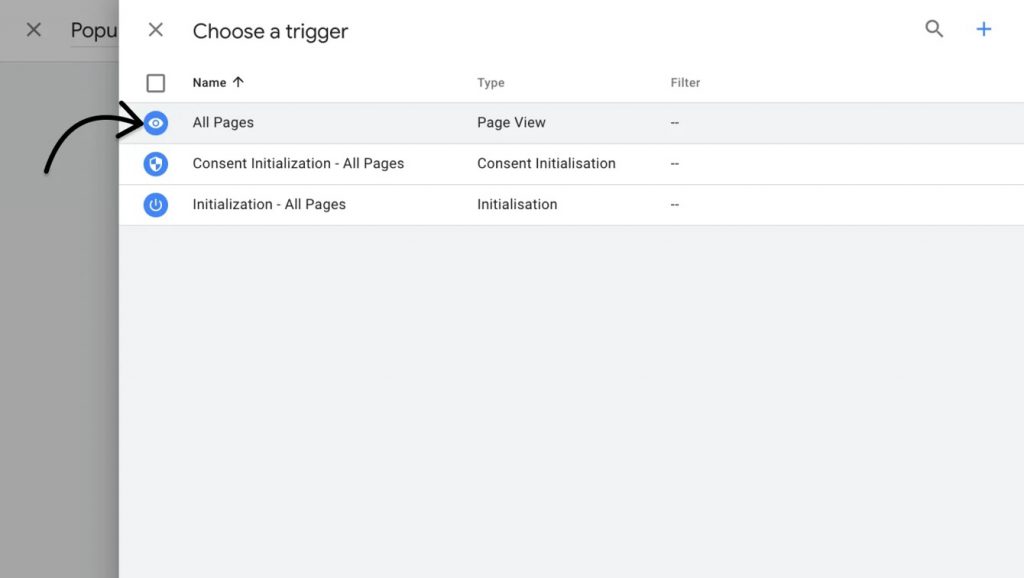
- Set the Trigger: All Pages (Recommended)
- To simplify setup and ensure the Userpop script loads across your site:
- Click Triggering
- Select “All Pages” as the trigger
 ⚠️ Important: This doesn’t mean the widget will show up everywhere.
- You’ll control where your widget appears using Step 4: Targeting Settings in your Userpop widget editor (e.g., only on thank-you pages, product pages, etc.).
- To simplify setup and ensure the Userpop script loads across your site:
- Save and Publish
- Click Save to confirm your tag and trigger setup
- Back in the GTM workspace, click Submit and Publish your container changes
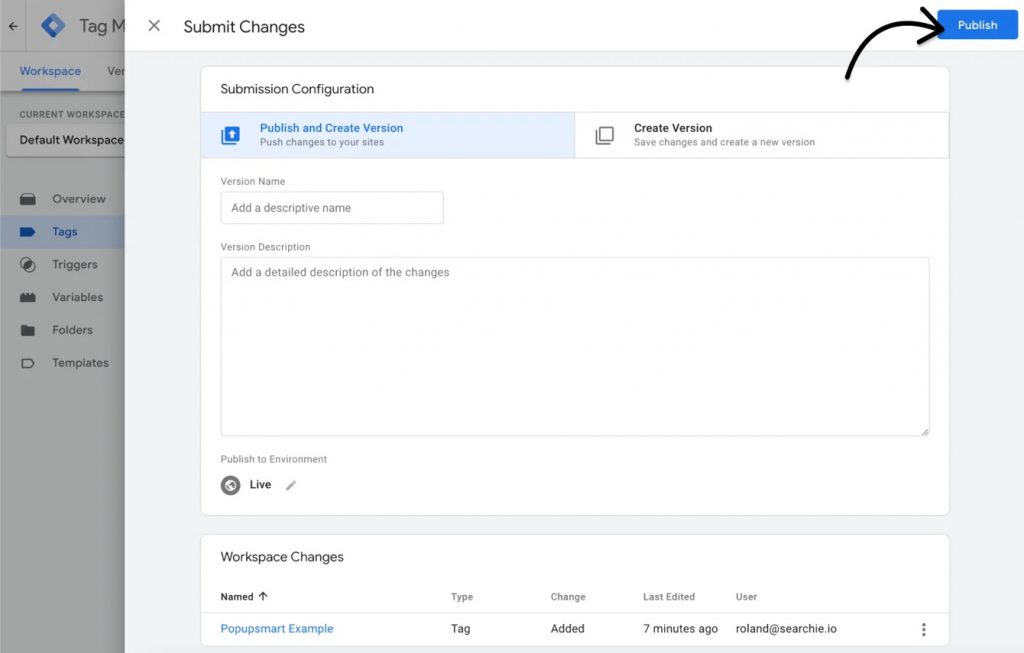
🎉 That’s it! The Userpop widget will now load on your site based on the trigger conditions you set.
How to Install Userpop on BigCommerce
You can install Userpop on your BigCommerce site by adding the code through Script Manager. Here’s how:
- Log into BigCommerce
- Go to your BigCommerce Admin dashboard.
- Open Script Manager
- Navigate to Storefront > Script Manager.
- Create a New Script
- Click “Create a Script”.
- Fill in the Script Details
- Name: Enter Userpop
- Location on Page: Select Header
- Select Pages: Choose Storefront pages
- Script Category: Select Functional
- Script Type: Select Script
- Paste Your Userpop Snippet
- In the Script field, paste the Userpop installation code you copied from your Userpop dashboard.
- Save Your Script
- Click Save to complete the setup.
🎉 That’s it! Your Userpop widget is now ready to go on your BigCommerce store.
(Use Userpop’s Targeting Settings later to control exactly where widgets appear.)
How to Install Userpop on Wix
You can add Userpop to your Wix site quickly using the Custom Code feature. Here’s how:
- Access Site Settings
- Log into your Wix dashboard.
- Go to Settings > Advanced > Custom Code.
- Add a New Code Snippet
- Click + Add Custom Code.
- Paste Your Userpop Snippet
- Paste the Userpop installation code you copied from your Userpop dashboard.
- Name the snippet Userpop.
- Set the Scope
- Choose whether you want the code to apply to All Pages or Specific Pages.
- 💡Tip: If you plan to control widget visibility using Userpop’s Targeting Settings, select All Pages.
- Set the Code Location
- Choose to place the code in the Head section.
- Apply and Save
- Click Apply to save and activate your code.
🎉 That’s it! Your Userpop script is now live on your Wix website.
What’s next?
- Add Userpop to multiple websites – Learn how to setup and configure the Userpop widget for multiple websites.
- Configure your comment widget – Learn how to setup the Userpop widget for maximizing engagement and increase the rate of customer feedback and conversations.
💡Tip
Need more help? Get support from our Community
Find answers and get help from Userpop Support and Community Experts